How to Label and Organize Boxes for an Easy Move
Preparing for a move? Relocating to a new home or office can quickly become overwhelming if you don't have an effective system for organizing and labeling your boxes. Without proper labeling, your move can turn into chaos, resulting in misplaced items, confusion, and extra stress. In this comprehensive guide, you'll discover step-by-step strategies for how to label and organize boxes for an easy move, ensuring a smooth transition to your new space.
Why Proper Labeling and Organization Matter During a Move
Before we delve into how to organize moving boxes, let's explore why thoughtful labeling and organization are essential:
- Efficiency: Well-labeled boxes help movers (and you) know where each box belongs, making unloading faster and easier.
- Preventing Loss: Proper labeling reduces the risk of items going missing or being misplaced.
- Simplified Unpacking: Organized boxes mean you can locate items quickly when settling into your new place.
- Stress Reduction: With everything clearly marked, the uncertainties and anxieties of moving day diminish.
- Protection of Fragile Items: Clear labels alert movers to handle fragile boxes with extra care.

Pre-Move Planning: Getting Ready to Pack
1. Gather Essential Packing and Labeling Supplies
- Quality moving boxes (various sizes)
- Permanent markers, colored markers, or colored tape
- Labels or printable moving labels
- Clear packing tape
- Paper and pens for inventory lists
- Stickers or color-coded dots (optional but helpful for color-coding)
2. Declutter Before Packing
_Before you even reach for your boxes, take time to declutter your belongings. Purge items you no longer need by donating, selling, or discarding them. This step will reduce the number of boxes you'll have to organize and label, making your move more manageable._
How to Organize Boxes for Maximum Ease
3. Pack Room by Room
To keep things manageable, pack one room at a time. This practice helps keep similar items together and makes both packing and unpacking much more efficient.
4. Sort Boxes by Category and Priority
- By Room: Group boxes according to the rooms they belong to: kitchen, bedroom, bathroom, living room, garage, etc.
- By Item Type: Separate by type: books, clothes, electronics, decor, essentials.
- By Need: Mark some boxes as "Essentials" for first-day/overnight needs.
5. Create a Master Inventory List
_Keep an inventory sheet or spreadsheet as you pack. List the contents of each box and assign it a unique number or code. This master list will be invaluable for keeping track of your possessions and locating specific items quickly at your new location._
Best Strategies for Labeling Moving Boxes
1. Use Bold, Legible Markers or Labels
Label clearly on multiple sides of each box (at least two, ideally three) to ensure the label can be seen no matter how the box is stacked. Use waterproof, permanent markers, or invest in printable moving labels for a more polished look.
2. Include Crucial Information
Effective moving box labels should include:
- Room destination (e.g., "Kitchen," "Master Bedroom," etc.)
- Contents summary (e.g., "Pots & Pans," "Winter Clothing")
- Special handling instructions (e.g., "Fragile," "This Side Up," "Heavy")
- Priority/unpack order (Essentials or "Open First")
- Box number (Box 1 of 10 Kitchen) to match your master list
3. Use Color-Coding for Easy Identification
Assign each room a specific color. For example: blue for the bathroom, red for the kitchen, green for the living room, and so on. Apply a colored sticker or tape to each box for that room. This can make unloading and organizing at your new home much faster and more intuitive--especially if multiple people are helping.
4. Try Numbering Your Boxes
Beyond room and content labels, numbering each box helps maintain control. Reference each number on your inventory list for easy retrieval of specific items and to check off boxes as they arrive at your new location.
5. Use "Essentials" and "Day 1" Labels
- Prepare at least one "Open First" or "Essentials" box for each main room (kitchen, bedroom, bathroom).
- Label these very clearly and separate them during loading--these will be the first boxes you'll need upon arrival.
How to Label Boxes for Moving: Pro Tips
- Label on the side, not on the top: Odds are boxes will be stacked; side labels are easier to spot.
- Use large, bold writing: Don't make movers squint--make your labels obvious!
- Add arrows: If boxes must remain upright, draw big arrows and write "This Side Up."
- Stay consistent: Create a labeling system and stick to it throughout the packing process.
- Don't over-label: Avoid overwhelming each box with too much detail--keep it concise but clear.
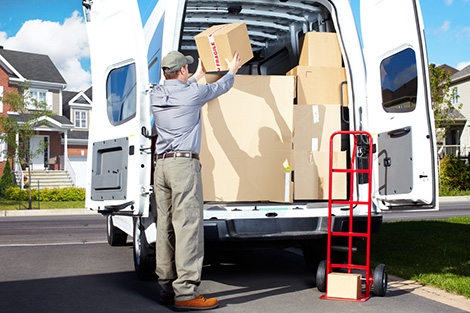
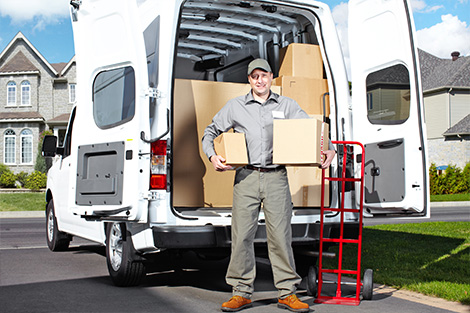
Organizing & Loading Boxes for Moving Day
Sorting and Staging Boxes
- Stage boxes in groups by room or floor when staging for moving day.
- Stack boxes by size and weight, with heaviest on the bottom.
- Keep "Essentials" boxes and fragile boxes separate for easy access.
Communicating Your System to Movers
If you've hired movers or enlisted friends, explain your labeling and organization method before loading. If you have color-coded boxes, show a color key. Point out boxes requiring special handling or high-priority boxes that should be easy to retrieve upon arrival.
Unpacking: Reaping the Benefits of Good Organization
Once you arrive at your new location, you'll relieve massive stress by having a labeling and organization system in place. Your color-coded, clearly labeled boxes will allow you to:
- Direct movers where to place each box.
- Find your essentials without rummaging.
- Unpack systematically, one room at a time.
- Identify if any boxes are missing by referencing your inventory list.
Sample Labeling Template for Moving Boxes
For effective labels, use a template like:
- Room: Master Bedroom
- Contents: Sheets and Pillowcases
- Box #: 3 of 8
- Handling: This Side Up
- Priority: Essentials
Tip: You can print out blank labels with these prompts in advance or write them directly on the box.
Common Moving Box Labeling Mistakes to Avoid
- Being vague: Don't just write "Miscellaneous" or "Stuff"--be specific.
- Using water-soluble ink: Rain or sweating boxes can smear ink. Use waterproof labels or markers.
- Labeling only the top: As mentioned, this information gets lost when boxes are stacked.
- Not indicating fragility or heaviness: Movers need this info to handle boxes safely.
- Ignoring color-coding or numbering: It's worth the extra step for organization and tracking.
Helpful Tools and Tech for Labeling and Organizing Boxes
- Pre-printed moving label kits: Available online or at moving supply stores for fuss-free labeling.
- Digital inventory apps: Apps like Sortly or Moving Van let you scan and inventory box contents with your phone.
- Printable spreadsheet templates: Create digital inventories that you can print or update as you pack--and check off during unpacking.
- QR codes: Advanced movers print unique QR codes for each box, linking to a digital inventory.
Frequently Asked Questions: Moving Box Organization
How soon should I start labeling and organizing boxes for a move?
Start organizing as soon as you begin packing. Ideally, you should begin at least four weeks before your moving day to give yourself plenty of time to declutter, organize, and properly label every box.
What's the fastest way to label boxes for moving?
Use color-coded labels for rooms, print pre-filled labels with boxes for room and contents, and keep your content descriptions brief but clear for quick labeling.
How can I make sure fragile boxes are identified?
Use brightly colored tape (red or orange) and prominently write "Fragile" on multiple sides. Share your system with anyone helping move or unpack.
Should I label boxes for storage differently?
Yes! If some boxes will go into storage, make a clear note or use a unique color. Indicate any special notes about climate sensitivity or time-sensitive retrieval.

Final Moving Day Tips for Labeling and Organizing
- Stick to your organization system until the last box is unpacked.
- Keep your inventory master list handy during the move and for a few weeks after arriving.
- Double-check each box label before sealing and moving out.
- Communicate your labeling plan to helpers.
- Start unpacking with essentials boxes to settle in quickly and comfortably.
Conclusion: Moving with Confidence and Clarity
Organizing and labeling moving boxes is not just an extra task--it's the foundation of an easy, stress-free move. With a little forethought, smart color-coding, clear labeling, and a robust inventory, you'll set yourself up for success in your new home or workspace.
Remember: The key to an easy move lies in organization. Start early, stay systematic, and your moving experience will be vastly simpler, more efficient, and more enjoyable. Happy moving!